Projects are my favorite! February’s service project by Champions for Kids had me excited! Assembling a Winter Survival Kit for a child felt like gearing up for a big trip! I kept thinking of what I’d want if I were about 10-12 years old. Of course, it’s not feasible to include everything in a “grab and go” survival kit, but I found some neat items!
After sharing my ideas and the challenge to create a Winter Survival Kit with my readers, I contacted my Community Resource Center. In our northeast state, there is a need for kits like this in homes, senior centers, and shelters. Of course, kids need a lot of winter gear like coats and boots, which I couldn’t fit into a kit, but it’s good to have an extra pair of these items stashed in the closet or back of the car … just in case.
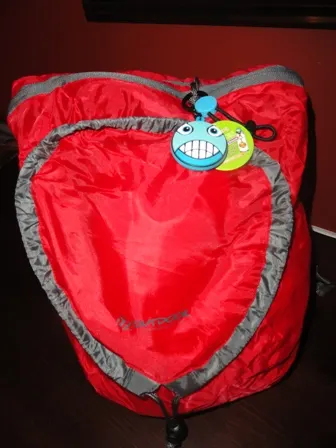
Then, with a list in hand, I took a shopping trip to gather supplies. At a local Walmart, the camping section was an amazing place to stock up on emergency items. Not only do they carry lightweight versions of various items, but also gear for being outdoors or without power, so it’s the perfect place to go for an emergency kit! I found this awesome nylon day pack perfect for holding the entire kit! (under $6!) I included a silvery emergency blanket (the kit is too small for a real blanket), and an emergency whistle. A poncho would’ve been good but all the ones I saw were too bulky.

Flashlights were my primary concern for my kit! I included two Energizer flashlights – a strong maglight with Energizer batteries (and backup) for good lighting, and an Energizer hand crank flashlight so the kit owner will never need to worry about running out of power! I threw in some glow sticks for fun, and as emergency backup lighting! (Love glow sticks!).

Personal care items were easy to find in the trial-size section where I grabbed a small clear makeup case and filled it with toothpaste, mini soap, lip balm, lotion, Kleenex, and hand wipes! Add a toothbrush and washcloth, and this kit is good for an overnight stay if needed! A mini first-aid kit was a perfect final touch!
Food for storage was harder to find at Walmart… I was surprised there weren’t more travel-sized snack options of a healthy nature. Lots of sugary things and items that included nuts, which I didn’t want in case the recipient has a nut allergy. So I went with breakfast bars (packaged in a slide-out pencil case to keep from crumbling), vacuum-sealed tuna fish, raisins, chocolate, and hard candies. I threw in some Emergen-C packets for vitmains/energy, and gum for boredom busting! I wish our Walmart had more natural/organic food items. Of course, a reusable water bottle and two bottles of water are staple items to include in any kit! All the food items I included should last at least 1 year.
Finally, I threw in a couple pairs of one-size gloves and a one-size hat for warmth, and added a bag of fun stuff: pen, notepad, mini Uno game… I wanted to find more fun items, but everything was either too large or gender specific.
The bag is kinda heavy because of the water, but otherwise, is compact and would keep a child warm, safe, lit, and fed for at least 1-2 days. 
At home, I assembled the kit by packaging all the related items into plastic bags to keep everything from getting jumbled, and protect against dampness. I included a laminated card that explained what was in the kit, how to use (food items need to be checked and rotated every 6 months), and suggested other items the owner can add to personalize the kit. I put in two blank self-laminating pouches because I think it’s very important for a kit to include a photo of the owner’s family and a list of emergency contacts/numbers.

Although I spent a good amount of money on this kit, I could have just as easily “shopped” my house to create a similar kit for less. Creating a Winter Survival Kit from what you already have on hand – either to stash for your family or to donate at a local spot – is a great family service project anybody can do!
I dropped the kit off this morning at the Community Resource Center at our middle school. Lisa, the director, enthusiastically accepted the kit, and we had fun going through the contents and talking about various ways this kind of kit would be used in our area. She’s got a great passion to help the people here in our town; she talked about possibilities of showing others in the area how to create their own kits, and the importance of being prepared for emergencies. Of course, I volunteered immediately to help her efforts to provide for the families of our town – whether seniors, children, or homeless! I am hoping we can work together sometime soon! I love the idea that this might not stop here but could blossom in our community into maybe a class or community project to help others. 
Have you taken the challenge to create a kit for your child or a community member? It’s easy to do – I’d love to hear about it!
DISCLOSURE: This shop has been compensated as part of a social shopper insights study for Collective Bias #CBias. All opinions are 100% my own. #EnergizerCFK #ChampionsForKids


Christy
Tuesday 28th of February 2012
I love the laminated instructions, very clever and helpful!
Christy
Tuesday 28th of February 2012
I love the laminated instructions, very clever and helpful!
Stephanie
Tuesday 28th of February 2012
Love the idea of including a laminated card and pouches - so smart!
Stephanie
Tuesday 28th of February 2012
Love the idea of including a laminated card and pouches - so smart!
T Rex Mom
Tuesday 28th of February 2012
We have emergency kits for all of us. We're working on updating our medical kit which is separate. The kids ones are tough, though, because they grow out of things so quickly. I still have a stash of cloth diapers in the car in my emergency kit. It has been handy when we forget a bib on an outing.
What a wonderful program and I really like the kit you put together. I just wish everyone would do this - if not for themselves then for their children.