Need to protect your favorite table? Sew this DIY fitted tablecloth in about an hour with this step-by-step tutorial with photos.
When my preschooler was gifted a gorgeous wood play table set, I inwardly mourned its demise. You see, when it comes to crafts with kids, some parents opt out of glitter and glue altogether. But we LOVE a good messy craft in our house! This table was not going to be long for this world. Unless… I could find a way to protect it from all the crayons, glue, and paint-water spills.
First, I tried a vinyl tablecloth, but my boys kept shuffling it off the tabletop as they colored and created. I needed something that stayed put! And it needed to be durable. So I set to work and in about an hour had a table cover that decorated and protected!
If you can sew even a simple straight line, you can definitely make this DIY fitted tablecloth tutorial in under an hour! It’s fast, easy, and won’t turn into a Pinterest-fail! I used a sewing machine, but you could hand-stitch. I’m guessing that might take about two-hours.

First, I did a trial run with an old vinyl tablecloth. This is a great way to upcycle an old picnic tablecloth and save a ton of money because they run about $3-8. After seeing how easy it was to sew this cornered tablecloth, I splurged on pirate printed PUL material (which is used for waterproof cloth diaper covers!) and sewed a cover that was more fun for the boys. Plus the print hides random crayon markings!
Bottom Line: Protect any table (large or small) from little crafting accidents with this easy-to-sew DIY Cornered Tablecloth. Whether you use an old vinyl tablecloth as your fabric, or spring for a custom PUL print at the fabric store, you’ll have this project whipped out in no time!

DIY Fitted Tablecloth Tutorial
Materials needed:
- Sewing machine
- Scissors
- Thread
- Straight pins
- Table (you’ll need the table you’ll be covering to be handy for measuring)
- Material – a waterproof material works best for small children. For length of fabric, it will depend on your table. I recommend measuring the table and adding 20 inches to the length and width of the table (so you get 10 inches margin on all 4 sides).
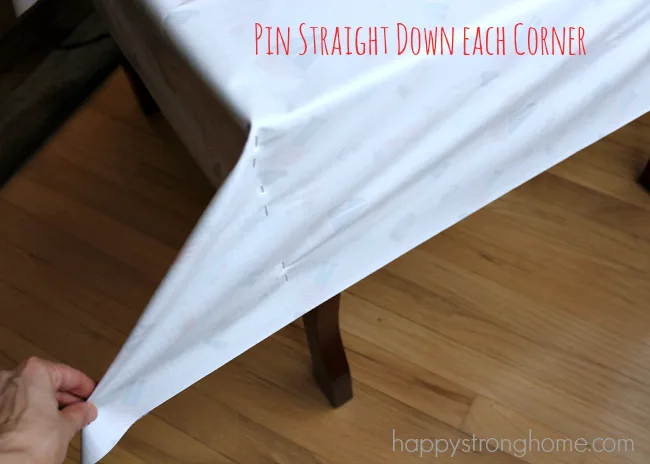
3. Without moving the tablecloth (you may wish to set a heavy book on top to keep it still), pin the fabric at each corner to make “wings” sticking out from each corner. Pin both at the very corner edge and all the way down the table leg, making sure you don’t slope inward if your table legs are recessed.
Sewing your Fitted Tablecloth
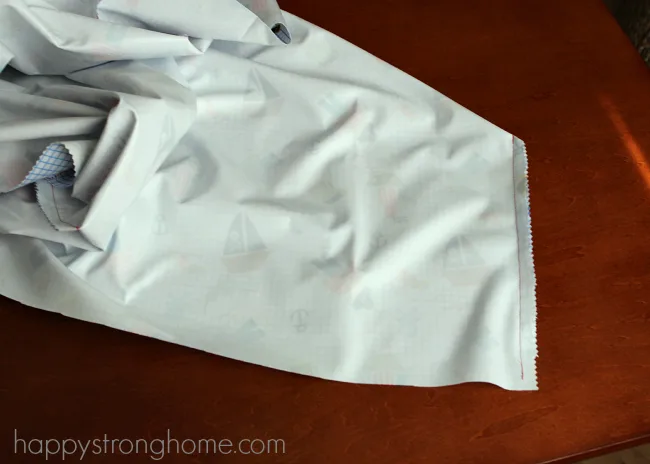
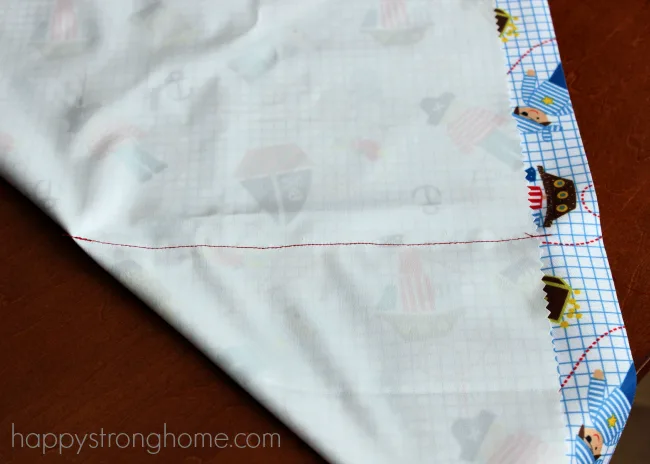
4. Now, sew a straight stitch down each corner “wing.” Trim the “wing” off to leave about a 1/2 inch edge. You could turn this down for a flatter seam, or if you have a serger that won’t be an issue. I just left mine!
5. Once you have sewn each corner, flip the tablecloth to the right side, and place over your table, making sure it fits snugly and without puckers. If you have pinned correctly, you should not have to redo this part – both my tablecloths fit correctly the first time – I only tell you that to say that it should be that easy!
6. Fit whatever chairs will be at the table under the table. You’ll want to hem the tablecloth edge up a few inches above the chairs so little legs won’t get caught on the tablecloth. Measure how many inches down from the table top your finished hem should land. For our children’s table, it was about 7 inches.
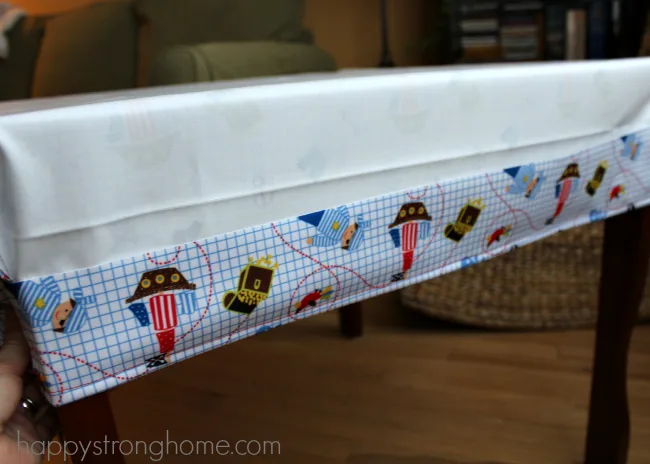
7. Next, flip the tablecloth inside out and put on the table. Starting at the corners, measure down to where you want your hem to be (mine was 7″). Fold your fabric hem edge up along the table leg, and pin. Do this at all four corners. Then, holding two corners, flip the fabric up to get a straight fold line across from corner to corner, and pin that in place. This is the easiest way I’ve found to get a straight edge from one corner to the next (without measuring or taking the fabric off the table). Repeat around all four sides of the table. I only folded my fabric up once, leaving a raw edge, but you could fold twice for a finished edge.
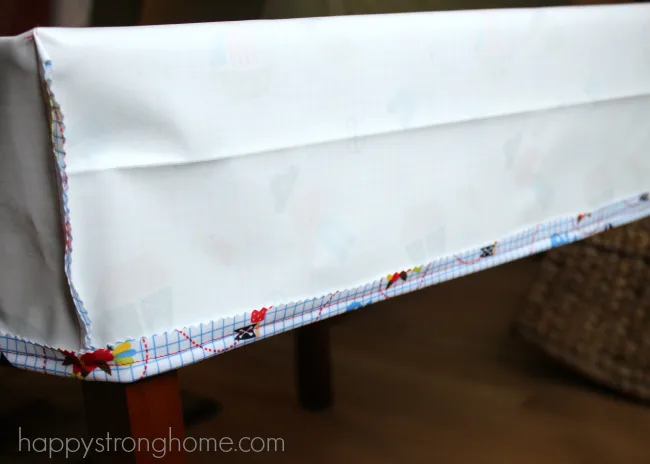
8. Sew the hem and trim any excess fabric down to 1/4″ from the seam. You may choose to use a straight stitch or a more decorate and secure zig zag stitch.
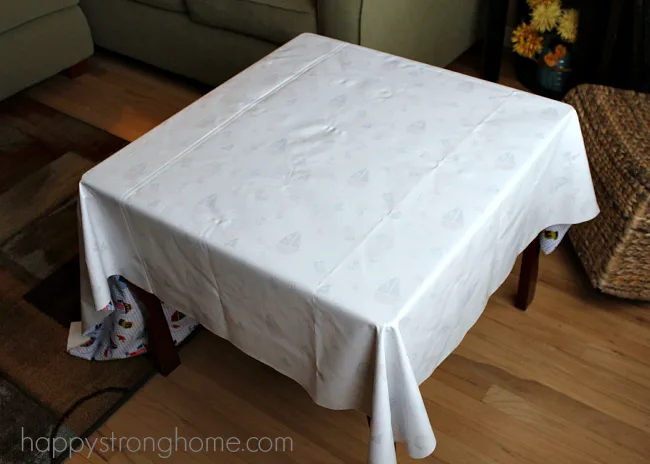
Lastly, put your tablecloth on the table and enjoy! Your kids are going to love it!
Where to get your fabric!?
Here’s a tip – use an “all-over” print, so that if your material pulls a bit and isn’t quite even, you won’t see the discrepancy. Stripes and lined prints will show any error immediately and it’ll forever bug ya! I found some great PUL fabric by the yard on Amazon.com and also some pretty square vinyl tablecloths. Here’s just a sampling of the fun prints I found!
Unicorn, Blue Cut by The YardPink Pencils Cut by The YardFootball, NavyDinosaurs on White RawrStars, TealTossed Heartbeat, GreenAmbesonne Fruit Fabric by The YardBlue Pencils Cut by The YardLamas, Blue Cut by The YardPine Tree, White
Please let me know if you try this tutorial out – I’d love to see a photo! If you’re looking for more great ideas to “sew or not to sew” check out my sewing project Pinterest board!
More Easy Craft Projects:
Add this DIY Cornered Fitted Tablecloth Tutorial to your Pinterest boards

Affiliate links have been used in this post. We are a participant in the Amazon Services LLC Associates Program, an affiliate advertising program designed to provide a means for us to earn fees by linking to Amazon.com and affiliated sites.




KW
Friday 11th of August 2023
We have something simular on our wooden garden table. It‘s protected but ventilated, and stays outdoor the whole year.
Sew to Sell: 99 Home Sewing Project Ideas & Fabric Crafts - Truly Hand Picked
Thursday 27th of July 2023
[…] 106. DIY Cornered Tablecloth Tutorial with Stright Simple Stich Line By Happy Strong Home happystronghome.com 107. Rustic Burlap Runner with Fancy Tassel Ends: An Inexpensive and Easy Sewing Craft […]
14 DIY Zero Waste Sewing Projects - DIY & Crochet
Sunday 5th of February 2023
[…] happystronghome.com […]
Laurie Moan
Thursday 27th of January 2022
Hi Julie, I was wondering did this work well on a vinyl tablecloth? I would like to do this with a vinyl tablecloth. Thank you.
20 Frugal Custom Tablecloth DIYs- A Cultivated Nest
Thursday 11th of November 2021
[…] DIY Cornered Tablecloth Tutorial – by Happy Strong Home […]