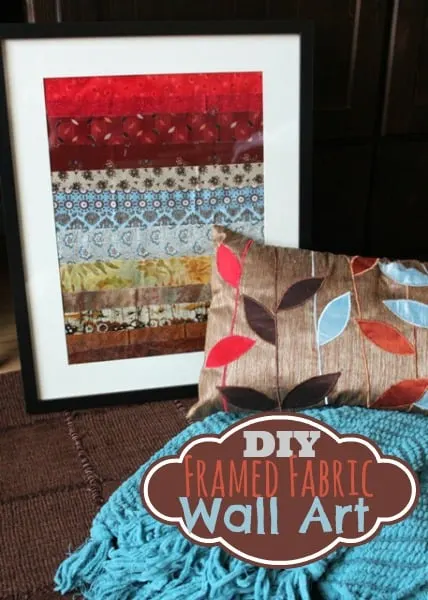
I’m really excited about this DIY project I finished last weekend! Like with the DIY Frame Tray I posted last week, this project was born of necessity.
I couldn’t find wall art that fit my reading nook decorating so, I decided to make my own!
This DIY Framed Fabric Wall Art project was so easy. About twenty minutes, tops!

Materials for DIY Framed Fabric Wall Art
- 1 large frame (really, any size, to fit your space)
- 1-2″ wide fabric strips (long enough to go across your frame; quantity depends on the size of your frame, but probably 10-12 will do)
- Scissors

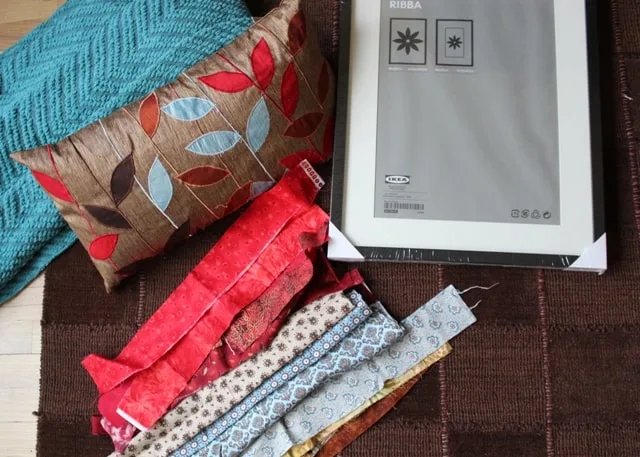
The trick is to find fabric strips that match your decor. I happen to have tons of pre-cut strips from a box of quilting leftovers, so the major work here was simply to find the colors I wanted.
I decided to go with an ombre look, shading from red to blue to brown – thus incorporating all the colors of my reading nook! I think what made finding wall art so difficult was that I have some teal blue accents mixed in with the reds and browns, which is not that common.
Create your Framed Fabric Wall Art

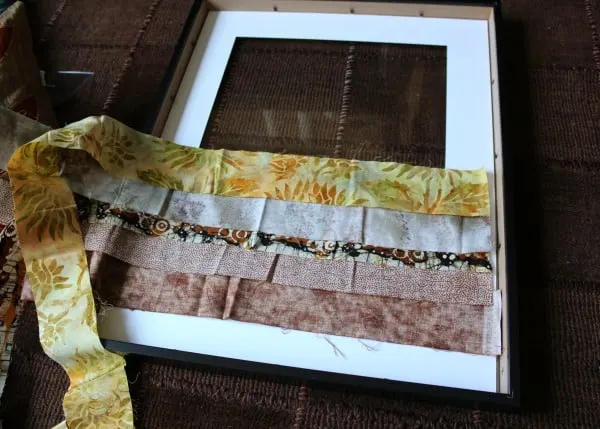
After finding the strips you want, arrange them in the order you like. Then, open up your frame and lay it glass down.
Now lay your strips down onto the frame (right side down so they will show in the frame!). I thought about sewing the strips together, but really that is not necessary.
After laying all the strips into the frame, replace the backing and secure tightly so the fabric can’t move.
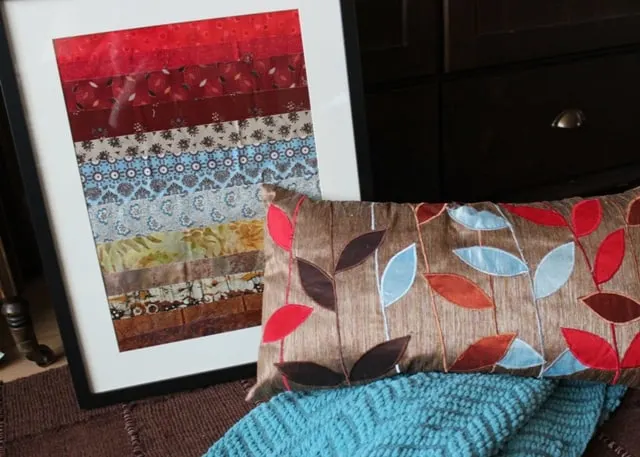
Enjoy your Framed Fabric Wall Art!
And that’s it! Yes, you’re done. Hang your framed fabric, step back, and admire!

Have you ever created your own wall art? What was your method?


Teri
Friday 7th of May 2021
I'd love to see a picture of your framed piece. Can you add a picture?
Julie
Friday 7th of May 2021
I’m sorry-the photos were all in the post but now they seem to not be showing. I’ll fix that!
The Best Crafts of 2015 - Moms and Crafters
Monday 21st of December 2015
[…] 12. Fabric Scrap Wall Art by Happy Strong Home […]
Welcome to our new blog
Friday 22nd of August 2014
[…] have transferred with us. So if you’re looking for cloth diaper reviews, homeschool ideas, or DIY/crafts…. there all still […]
Welcome to our new blog
Friday 22nd of August 2014
[…] have transferred with us. So if you’re looking for cloth diaper reviews, homeschool ideas, or DIY/crafts…. there all still […]
Stefani
Friday 24th of January 2014
What a neat idea. I like the ombre look!