This is a sponsored post written by me on behalf of Plasti Dip. All opinions are 100% mine.
They say the first kid gets the baby album, and the rest get nothing? That's how it's been for my second son when it comes to putting name letters on his bedroom door! My firstborn had his name up by his first birthday! My youngest…? Well, he just turned seven, and I just finished up this DIY Personalized Name Letter Craft for him.
So I guess he can officially live here now! Ha! But seriously. I'd been sitting on these wooden letters (not literally sitting, mind you!), for nearly a year trying to think of a good way to decorate them. Then Plasti Dip® asked me to come up with a craft using their Craft line of colors. Voila! A match made in… the paint aisle!
This DIY personalized name letter craft is perfect for kids with unusual names or spellings, and can be customized to their room decor or personal style! 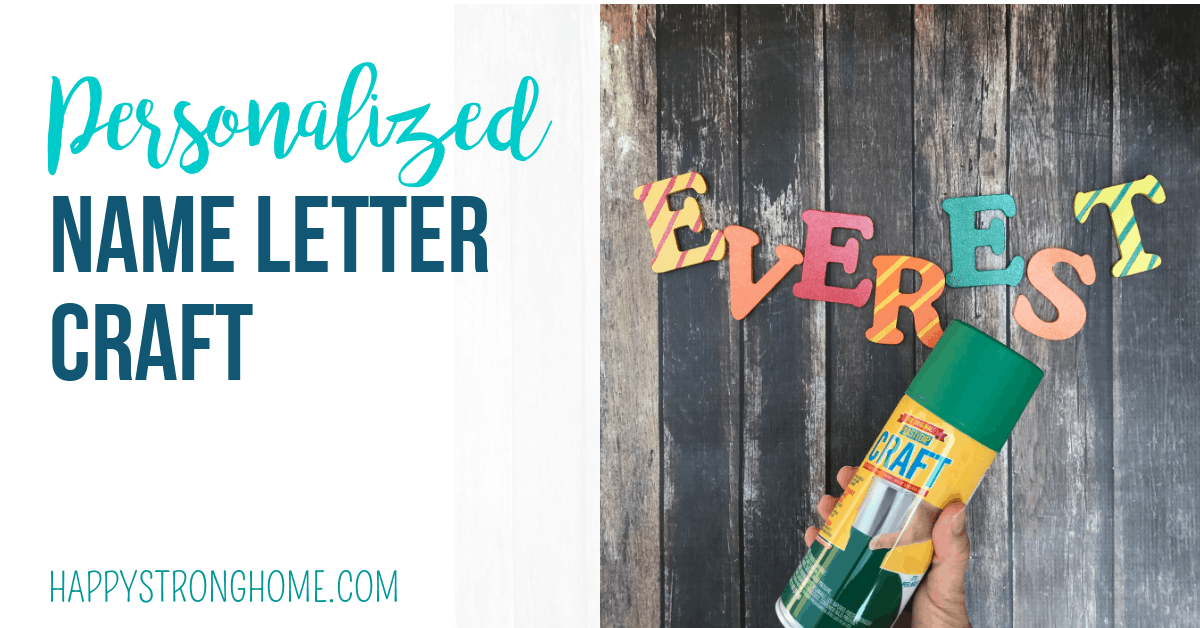
Hubby and I had done a project previously with the Plasti Dip® Craft line. You can see our DIY Dipped Chair tutorial here.
What's Plasti Dip Craft anyway?
In case you've never heard of it before, Plasti Dip is an air-dry rubber coating. Their craft line is perfect for all your home improvement and DIY crafts, and you can combine their Craft colors with their other products and enhancers. (Even create your own color!). It's flexible so it can cover just about anything. And you can even peel it off, should you change your mind about a project or color choice.
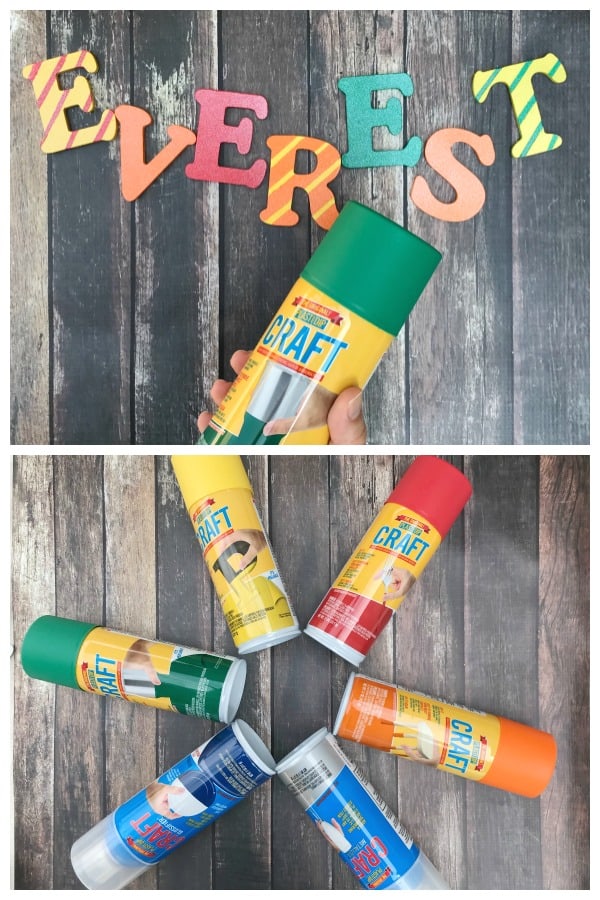
Now, I am pretty much banned from painting things in our home because I make such a MESS when I paint. But… Plasti Dip® is easy to spray and keep in one spot while you work. So hubby trusted me to do this project all on my own! A few sheets of paper on a drop cloth kept my work area tidy. I used almost all the colors in Plasti Dip's craft line and didn't get a smidgen on anything!
Okay, I'm curious, where can I get my own Plasti Dip!?
Grab some Plasti Dip Craft at your local Home Depot, Amazon, or Awarehousefull. You'll love coming up with new ways to use this cool craft supply! Shop now on Amazon
I know you're all going to have such great ideas for using Plasti Dip® Craft. Now let me show you my latest idea - this DIY personalized name letter craft!
DIY Personalized Name Letters are the bomb!
Look, I don't know why kids LOOOOOOVE seeing everything with their name on it. You'd think they'd get tired of it after hearing us say it fifty-bajillion times a day. But still, kids love having their name emblazoned onto all their belongings.
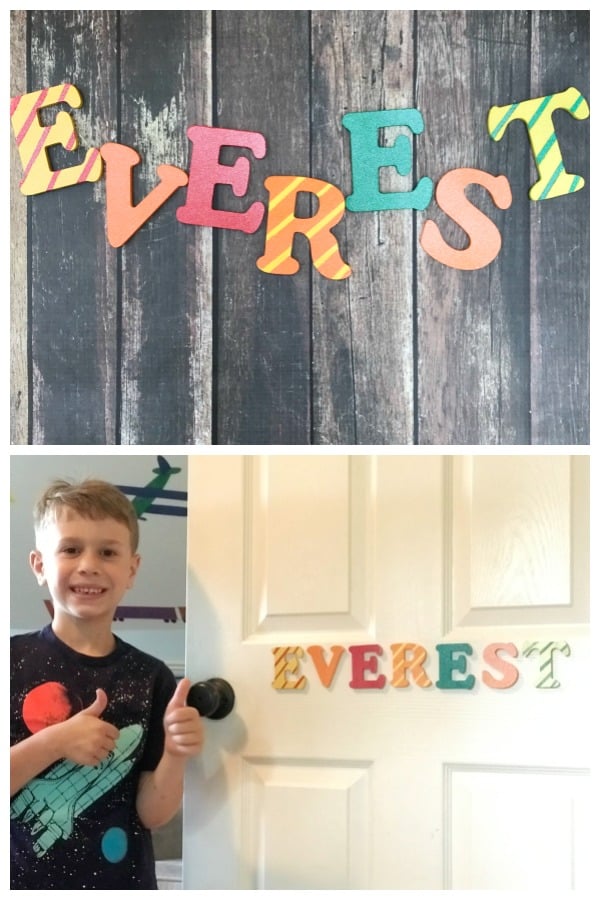
Of course, hubby and I chose two more unusual names for our boys. Our son Asher is just starting to find things with his name, due to the rise in popularity of his name. But our youngest, Everest? Well, unless he's buying mountain climbing gear or Paw Patrol items, he's unlikely to see his name ever on a personalized item.
That's why crafting your own DIY Personalized Name Letters are the bomb for kids with rare or unusually spelled names.
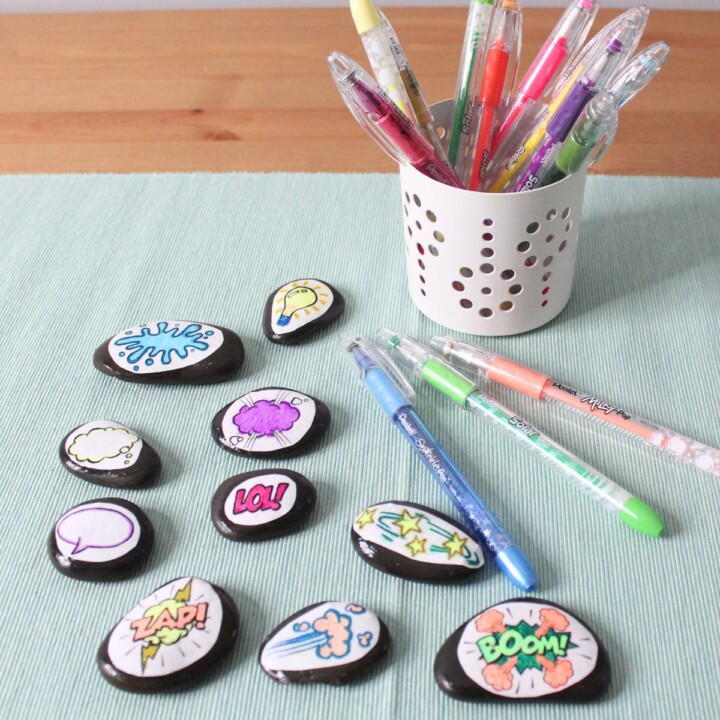
By the way parents, when you pick out your child's name, think short. My son has eight letters in his name! On the bright side, I got to experiment with a ton of fun Plasti Dip Craft colors and design combinations! I really like how his letters turned out.
And he loves them too!
Customize your personalized name letters to your child and decor
The best part is, Plasti Dip can peel off! So… if down the road, he decided he didn't want a rainbow of colors on this door, I can just peel some off and reapply fresh colors. Pretty cool, right?
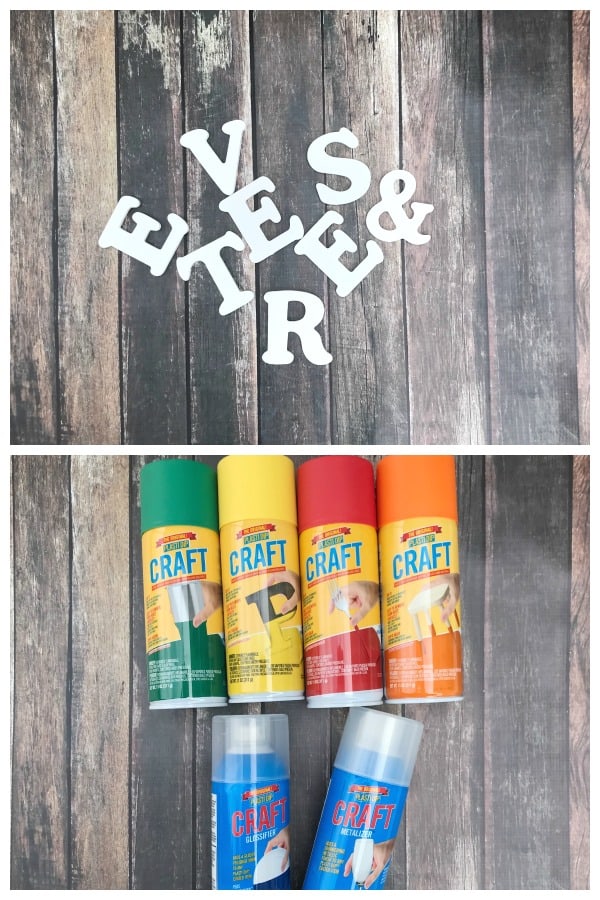
Besides having eight cool colors in their craft line, Plasti Dip has a number of enhancers to mix up the style of your letters.
- Try the Glossifier for a glam look.
- The Metallizer is perfect for a shimmering style.
- And Pearlizer is perfect for lustrous letters!
Create your own DIY Personalized Name Letter Craft
Ready to start your own Plasti Dip Personalized Name Letter craft for your kids? Here's a quick video demonstration, then I'll give you the nitty gritty details after you watch.
Here's what you'll need:
- Wooden letters to spell out your child's name (or other word)
- Several colors of Plasti Dip Craft and enhancers - Get yours at Amazon
- Painters tape and/or small sticky dots for designs
- Cardboard or Paper for covering area
Instructions:
- Decide in advance the colors of your letters, especially if you're creating a pattern. When I created the dotted and striped letters, I had to decide which letters would get the design elements. Then I considered the FINAL coating color to be sure I got my color pattern right.
- Apply a first coat to all your letters. Allow to dry 30 minutes per package directions.
- Apply a second and third coat to achieve desired color density. Allow to dry between coats.
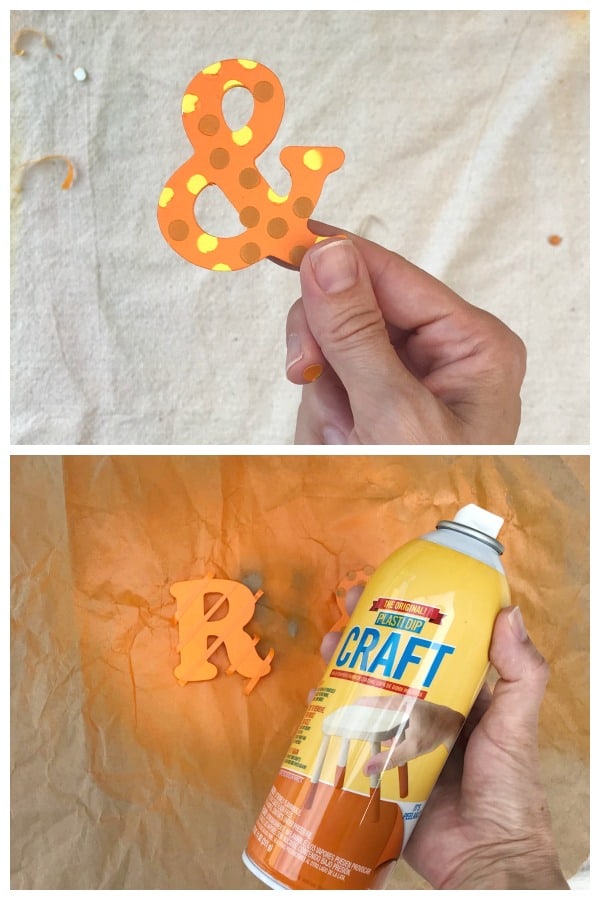
- If creating a striped or dotted design, do this after the second coat. Apply tape or stickers. Then apply two coats of a new, contrasting color. When Plasti Dip is dry, gently peel off tape/stickers. Be careful not to stretch Plasti Dip. Remember that it is peel-able plastic coating, so take care not to snag the paint while you're removing the masking.
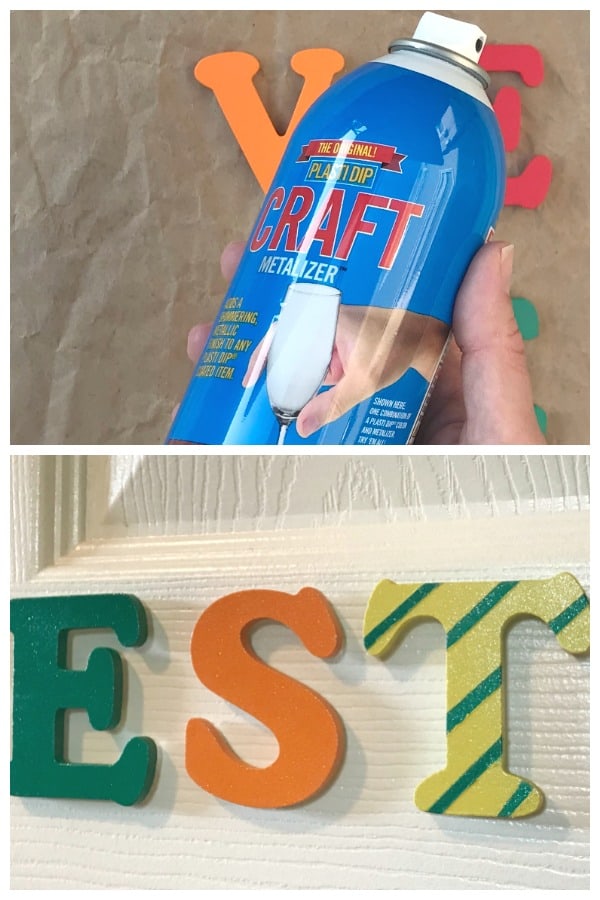
- Once your letters have the desired colors and designs, apply the enhancers (Glossifier, Metallizer, Pearlizer).
Now your letters are ready to hang or display. Or however you're going to use them. Maybe you could attach magnets to the back and let your child put them in their school locker. Or use as fridge decor. So many ways to use personalized name letters.
Have blast creating with Plasti Dip Craft! And show me your projects! Just tag me @juliekieras or @happystronghome so I can see what you made!
Happy crafting!


Julie, I had to laugh at your comment about picking short first names. My youngest is Mary Elizabeth. I was kind though and gave her a three letter a middle name.